Pages

Monday, August 19, 2013

Buffalo Chicken Goodness

Today was my first day with kiddos of the new school year. It was a great day! I'll be back tomorrow with some pictures of my classroom, which I have to say, I'm pretty proud of this year :)

We had a last minute family get together Saturday-nothing but good times, sunshine, delicious drinks, and lots of laughs. We always split the meal duties. Derek smoked some chicken and I made a few treats to munch on by the pool and this recipe was a huge hit! It is adapted from a food blog I follow, The Girl Who Ate Everything . I don't think you can ever go wrong with buffalo-chicken-anything and this is no exception!

I'm a firm believer you can cook anything in a wonton wrapper. They are so versatile! My talented friend Cali has a delicious wonton recipe on her blog that you should also check out to expand your wonton-repertoire :)

For this recipe, start by cooking up some chicken and shredding it. Set it aside for later use. Then, spray a mini-muffin tin with a non-stick spray. Start lining each muffin spot (what would each of those crevices called, anyways?) with one wonton wrapper. Just squish them on in there!


Mix one package of cream cheese, 3/4 cup cheddar cheese, 1/2 cup buffalo sauce/hot sauce, 1/2 cup ranch dressing, and the shredded chicken.
 
It's kiiiiind of going to look gross, but don't let it stop you! It's worth the ugliness, I promise. Once it's mixed, spoon filling in each wonton. Fill each about half full.


Once they're all filled, use 1/4 cup shredded cheddar over the top of the wontons. Let's be honest, 1/4 cup was not enough, I probably used more. Also, sprinkle blue cheese crumbles over each. So. delicious.
Cook in a 375 degree over for 10 minutes.
 
Creamy. Delicious. Buffalo-y. Oh my goodness. I can't get enough. I had extra filling and decided to throw it in a small serving dish, cover with cheddar and blue cheese, and bake it at 375 degrees for about 15 minutes. We use tortilla chips to scoop the goodness!
 
It is bananas how amazing these are! :)
 
-L


Thursday, August 8, 2013

Monogram #Obsessed

Summer is coming to an end. My heart breaks a little when I think about that. I don't know if it'll be harder to get up every morning and to go to bed at a decent hour each night. Either way, I'm not looking forward to the schedule, planning, and exhaustion that comes with the first few weeks of school. I am looking forward to a new bunch of kiddos and the laughs we'll have together though :)

Since I've had this summer with no work, I've been organizing and decorating our house as much as I can. I'm always so tired by the time I get home from work and have the best intentions of these home projects that end up getting thrown on the back burner in exchange for a glass of wine and some reality TV courtesy of Bravo. So, summer is the perfect time to get a few projects done!

I'm kind of obsessed with monograms. If I had my way, there would be various monograms in every room of our home. I've wanted to do something cutesy on our front door for awhile, but haven't had that stroke of genius I needed to get started. About a month ago, I received my Very Jane email first thing in the morning and was scrolling through the daily deals when I found this twine covered letter. Now, it probably would have been easier to spend the $12.99 plus shipping on this little nugget, but instead I thought, "I can totally make that!" So, off I went to JoAnn Fabrics and gathered my bounty of goodies to get started. I needed: an "M," twine, black ribbon, and some rustic looking flowers. After coupons and my teacher discount, I ended up out the door for less than $10!


Once you're situated, you just start wrapping. I'll be honest, it takes awhile. And it probably would have been much simpler if our last name started with an L or a T, but alas, M it is. I started with the two straight "legs" of the M, then moved onto the more challenging parts.
 
 
Use your hot glue gun to attach the end of the twine to your letter once you've sufficiently covered a portion. If you have wonky parts like the middle of the M, hot glue as you're wrapping to keep everything in place. It gets a little hairy if you don't :)
 
I attached the flowers with hot glue, as well.
 
Ta-da! Here she is, hanging on the front door!
 
 
Give this one a try for sure! It turned out adorable :)
 
L


Friday, July 19, 2013

Mangia!

I went to Publix yesterday and found pizza dough BOGO. Publix pizza dough is a gift from above. The salt to my pepper. The sunshine on a cloudy day. My silver lining. It's delicious and so handy. So, I picked up two bags of their dough and went on my merry way. I wasn't sure if I wanted to go down the pizza road, so I settled on calzones.

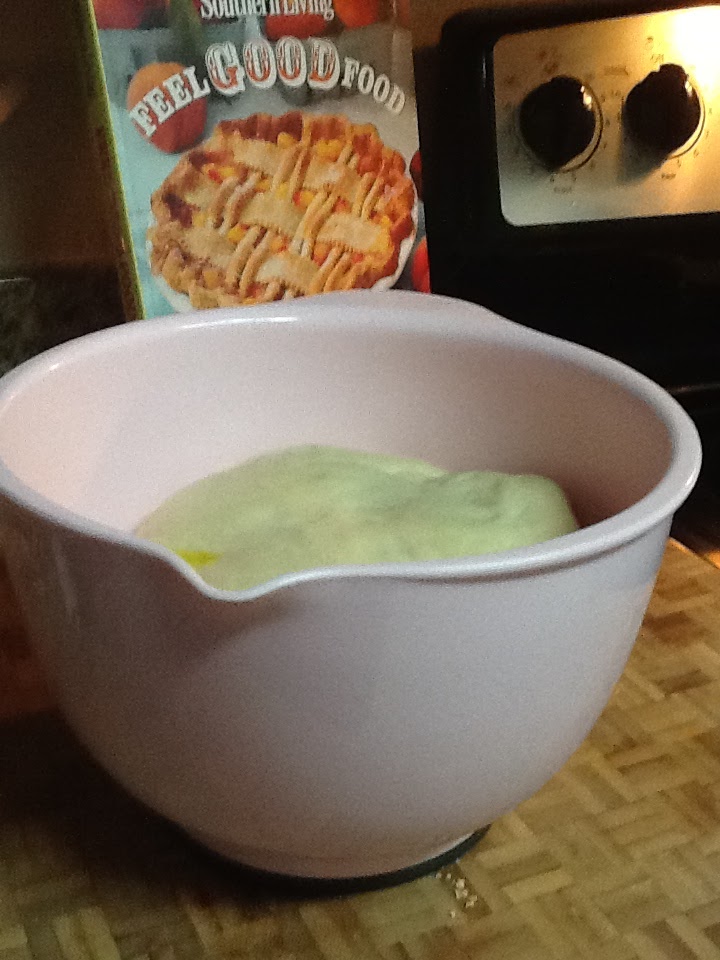
About two hours before you plan on cooking, take the pizza dough out of the bag and place it in a large bowl with a few drips of EVOO so it doesn't stick. Put a dish towel over top the bowl and let it rise a bit.


Closer to dinner, go ahead and cook up the toppings of your choice. We went for a supreme-type calzone, sans sausage for mine. I browned some sausage for Hubs' and also cooked up green pepper, onion, and mushroom.


While all this is happening, combine 1 egg, 7-8 oz of ricotta, 3/4 cup of shredded mozzarella, and 1/4 cup of parmesan cheese. Add a dash of salt and pepper and a rough chop of a handful of fresh parsley. Stir this until combined.

Now comes the fun part. And by fun, I mean the part I'm absolutely awful at. I have a slight the biggest issue when it comes to rolling out pizza dough. I don't know why it's such a struggle, but it always is! Roll your pizza dough fairly thin. Remember, you're going to be tucking all the goodness inside of it, so you don't want a Marshmallow Man-esque pouch of dough surrounding it. My mom (who is a genius in the kitchen) recommended I used EVOO instead of flour on my surface, which has helped tremendously.


Once it's rolled, use a pizza cutter to cut the dough in half. There are your two calzones! This makes two hefty calzones, so if you'd like them smaller, try cutting your dough in thirds or quarters.

Fill half of each pillow of deliciousness with a good portion of the cheese mixture and your toppings. We included mini pepperoni and the toppings I cooked up earlier.

 
Flip the other half over and pinch the edges closed. You want this to be pretty secure or you'll end up with an explosion. Which may be delectable, but will also be a mess. Bruch the top of 1 beaten egg, as well to get it nice and brown.


Cook these bad boys on a cookie sheet at 400 degrees for 12-15 minutes. Heat up marinara sauce and dig in! I'm not kidding when I say these bad boys will blow your mind.


-L


Thursday, July 18, 2013

I Love You a Bushel and a Peck...

Last night, I was able to FaceTime with one of my oldest friends and favorite people in the world. We talked and laughed for two hours and it just warmed my heart. I truly have missed her more than I can put into words. It's so nice to have those friends where you can just jump back in, like no time has passed. In our conversation, she mentioned my blog! (Say what?!) and that I inspired her to make a make-up brush jar with all the gliterry goodness I posted about here. She made one for herself with the most amazing copper sparkles and even made a turquoise one for her roommate! I was so excited and in turn, felt inspired to craft myself today!

Hubs and I have been married for almost four months, but we have lived in our home since October of last year. While we adore each other, it's so easy to get into an everyday routine that leaves little time for spontaneity, random acts of kindness, and moments to show each other how much we love them. I've seen some nifty frames with little, "I love you because..." phrases and thought this would be the perfect way to encourage some thoughtful conversation between D and me.

I started with some cardstock and a delish frame I found at Home Goods. The cardstock was a whopping 0.38 with the 40% off sale at Joann Fabrics right now and the picture frame was 5.99! I spent a total of $6.79 on this project, which I have to say, is a steal :)


I chose cardstock that will match my vision for the kitchen, so it can stand the test of time in there. It's a nice seafoam green/periwinkle and the frame is a distressed cream color. Love!!

I used Word (my personal favorite) to create the lettering for the frame. Many people don't know that I'm a self-proclaimed fontaholic. I can't get enough. I spend more time choosing what font to publish something in than I do on the actual creation of a document. It's a bit ridiculous. Anyways, the font I used for this particular project is called Pea Missy Cursive. One of my all time faves! I used a size 28 font for a 7x5 frame.

I then printed the lettering on the cardstock. Make sure you don't choose super thick cardstock as it won't go through your printer (found that out printing some things I made for a wedding recently. Oops!).

I don't have a ruler at home. Can you believe that? I'm a teacher with no ruler in her home. I can tell you I have about 80 in my classroom though! I digress. Because of my lack of ruler, I used Word to create a 7x5 rectangle and printed that, as well. I cut that out and lined it up with my cardstock and cut the cardstock the same size.


Then, simply put the cardstock in your snazzy frame and bam. Mind. Blown. I set mine on the little breakfast table we have in our kitchen and seriously? Complete perfection. It's sharing the spotlight with some beautiful flowers! :)


I hope this proves to be an exciting and fulfilling little project! :)

-L

Tuesday, June 11, 2013

A Little Bit of This, A Little Bit of That

Now that it's summer time (I have never been so excited for something in my life!), I'm spending more time in the kitchen and a little extra time making this house of ours a home. The whole house-a-home thing is quite the process! I feel like there's always some daunting project to complete. Luckily, I have two months to muddle through it all :)
 
My birthday was a week ago and my mom completed my Pioneer Woman cookbook collection by gifting me with her first cookbook. I adore PW and couldn't wait to sit on the couch with a glass of wine cup of coffee (geez, Lyndsey, get it together, it's 9:30AM!) and sift through her recipes. I came across a recipe for Chicken Spaghetti and decided to try it out last night. I changed the recipe a bit, but it was definitely a hit!
 
Start by cooking up your pasta-keep it al dente-and cooking the chicken. You could technically boil the chicken, but I love to get lots of flavor in my chicken during the cooking process with EVOO and seasonings. I added salt, pepper, garlic, season salt, and cayenne pepper to mine.

 
While that's cooking, chop up your veggies! You'll need 3/4 of a small onion, 1/4 cup of green pepper, and 1/4-1/2 cup of sliced mushrooms.
 
I threw these into a measuring cup to hold until I was ready to mix. They're all going to the same place, so don't worry about keeping them all separate.
 
Once your chicken is cooked, shred it.
And shred your cheese! I prefer to use a block of cheese and shred it myself. I think it tastes better and melts so much better than the pre-shredded cheese. If you like the pre-shredded, you just saved yourself a step! You need about two cups :)
Finally, add everything to one bowl: pasta, chicken, veggies, cheese (leave 1/2 cup out of mixture), and also throw in a can of Cream of Mushroom soup and 1 cup of chicken stock.
 
Stir this until it's mixed up nicely and place in a baking dish. Once you've got it in the baking dish. Cover with remaining 1/2 cup of cheese.
 
Bake at 350 for 35-40 minutes or until bubbly and melty and delicious :)
 
 
Ummm, not really sure why I can't flip that picture! It's worth the head tilt though, it was super creamy and tasty!
 
 
See y'all soon!
Lyndsey


Wednesday, April 17, 2013

Feeling Fishy

D and I love seafood. Truthfully, I love seafood more than I love chicken, steak, etc etc. We buy our meats/fish from Sam’s Club and package it into smaller portions. The prices at Sam’s can’t be beat and it makes dinner time much easier when you’ve already got the choices on handJ
 
Salmon is a go-to for us. It’s in our price range; it’s delicious, and super easy to cook. I’ve been looking for new ways to cook salmon lately and have come up a bit empty handed. So, I decided to take matters into my own hands and whip something up on my own. Last night, I threw together a marinade for some salmon while D was at the gym. It was super easy and we both really enjoyed it!
 
 
Cast of Characters
 
Less sodium soy sauce (do yourself a favor and try the lower sodiumyou can’t tell the difference, I promise), brown sugar, 2 garlic cloves, olive oil, pepper, lemon juice, and a drizzle of honey.


Start adding the ingredients to a bowl. 1/3 cup of soy sauce, a good drizzle of olive oil, the juice from half a lemon, 1/3 cup of brown sugar, and 2 minced garlic cloves. I also am lucky enough to have access to local orange blossom honey and added a good drizzle of that too!
 
 
Your marinade will look weird. It’s okay! Whisk it together until the brown sugar is mostly blended in.


Add the marinade to a storage bag with the salmon in it. Tightly seal the bag and place in the fridge. The longer the better!


When you’re ready to cook the salmon, take out of the bag and place in a baking dish. Spoon some of the marinade over the salmon. Place in the oven at 400 degrees for about 20-25 minutes, depending on the size of your salmon.


I served the salmon with sweet potatoes, roasted yellow zucchini, and a big salad. Delish!
 
What’s your favorite way to dish up salmon??
L

Wednesday, April 10, 2013

Sparkles!

As we get more comfortable in our home, I've been picking up little DIY projects here and there that are quick and easy. I need quick and easy for the next 38 days-until Summer vacaation when I can take on the more intensive projects :)

Am I the only person in America who shoves her makeup brushes into her makeup bag? I shove and shove, then when I actually need one, it's fallen to the bottom of the bag and I can't find it. This normally happens at 6AM and I search and search for hours lazily use something else.

This project was literally the easiest thing I've ever done! All you need is a handful of supplies and a little down time :)

The cast of characters...
I have about 100 mason jars on hand from our engagement party. Why I convinced myself we all needed to drink out of mason jars, I'll never know! Nonetheless, I now have to find creative ways to use them. I used: a styrofoam takeout container from Carrabbas (leftover from the rehearsal dinner), black ribbon I had on hand, a mason jar (any size would work!), Martha Stewart Glitter Glue, and Martha Stewart Gold Glitter. Both the Martha Stewart products were bought at Michael's with a 40% coupon, so in total, I spent less than $7 on this project. Sometimes it's worth the extra trip to get another 40% off, so I used two coupons on two separate occassions to get my products for the price I wanted :)

Next step is to cover the jar with the glue. The snazzy part of the Martha Stewart Glitter Glue is that it has a brush attached to the top, so it's super easy to spread! You want to cover the mason jar pretty evenly with the glue.


I am amazed at how creepy my hand looks here...
 
I digress...Once your mason jar is covered with glue, you want to get ready to SPARKLE! Now, I will be honest with you because we're friends, right? I originally poured the glitter in the container and tried to roll the mason jar. So. Dumb. Don't be like me.
 
Hold the mason jar over the styrofroam container and pour the glitter over the jar, shaking often to get off any excess glitter. Much more intelligent than the Pour and Roll method.
 
Once you're sufficiently glittered, admire your hard work!
 
Give it as much time as possible to dry, but once it is, you're last step is to ribbon that little sucker up! Use whatever color ribbon tickles your fancy. I'm personally a huge fan of the black-on-gold look.
 
 
Mine's all cozy next to my sink in Mr. D's and my bathroom :) Where are you putting YOUR sparkly mason jar?


See ya soon :)

L